As developers, we often build scripts and tools to sharpen our workflow. One of the simple scripts that I am refining is palm-run, my swiss-army knive of a tool that deals with packaging, installing, launching, and tailing logs as I develop my application.
I put together a walk through of palm-run in the context of creating a new webOS application from scratch. In the screencast below I cover:
Generating your webOS application structure
Implementing a one-scene application
Packaging the application and running it in the emulator
Running an IPK directly, no packaging here mate-y
Setting up your application for development and production uses (more below)
Using the Palm Inspector to take a peak at the structure of your app as it runs
(I recommend going full screen on this bad boy to help read the deets.)
Development vs. Production
I wanted to go into a bit of detail on this one. When you build an app you want to have different builds for development and production. In development, you want debugging turned on with verbose output. In production, you want to exclude all but the necessary files.
The latest version of palm-run lets you tell it that you fancy production mode via -P.
You can enhance your webOS application to do more in this world by doing the following:
Create a config directory at the app root
Create framework config files for the two use cases. Here are two common versions:
Create exclude files for the two use cases (excludes_development.txt and excludes_production.txt)
Now you are set. To see a shell app that uses this, check out palmrun-configtest. If you build the app you will see that there isn’t console output if you palm-run with the -P option.
What else would you want a high level program like this to do for you?
When Ben and I joined Palm to run Developer Relations, we knew that we wanted to eat dogfood pretty quickly. We have had some mobile related projects in the past, but they were either mobile Web sites, or Java based. Being able to take our web skillz to rich mobile devices was much more new and exciting.
Building sample code and apps is useful for developers, and the team will be doing plenty of that (e.g. this is how you use the awesome List widget in every which way, and why you would do X, Y, or Z) but building a production app is a whole different level.
We wanted to learn what it is like for our developers to design, build, and distribute webOS applications. We could have started with a smallish app, but no :) Instead we took the great work of Justin Newitter (who built the original app) and went running with an updated Facebook app. Along with other great developers in the dev relations world, we have gotten our first early release out there today.
Here is a walk through of the app by PreCentral:
We have definitely learned a lot in our short time on the app, and this is the first release of many. I really want us to have a regular cadence to our releases. If there is a feature you are excited about let us know.
We added a broad feature set to the application. The first Facebook application was very much about synergy. Why put something in an application silo when you can bake it into the platform? I still contend that webOS is the best platform for Facebook users as it integrates throughout. Other mobile platforms do some of this, but I think we continue to do the best job here.
There are a bunch of Facebook features that our users still wanted though, so we worked with Facebook themselves to prioritize this list. The top features were access to Facebook Mail, full profile access (info, wall, and photos), people search, events and birthdays. We also wanted to do interesting things to the UI as we bring in these features. Oh, and a couple of mini-easter eggs.
Designing the application was challenging and a lot of fun. At a high level, working out a design that is true to webOS *and* a strong brand such as Facebook was a balancing act. You will run into this same issue even without a brand like FB. How does it have your DNA and still fit in with the core platform. This has been a design consideration since the dawn of time. Do you make a clean Mac app that looks like Mail.app? Do you do your own UI that looks like a funky Flash UI? Most of the time you are in the middle.
One feature that we spent time on was the base navigation. We wanted to make it incredibly easy to get to features you use often, and also quick to get to all features.
We ended up with a solution that made the following decisions:
News as Root
The root of the application is the news feed. Some Facebook apps have an icon window as the root, but we decided to behave more like the Facebook website itself. The news stream is the blood line, so start there. No matter where you go in the app, if you back gesture away…. you will always end up at the news stream.
Also, just like the iPhone app, we share the shake gesture as a way to refresh the data here. Shake away.
Status Matters
webOS devices have hardware keyboards and are great for creating content. In the Facebook context this means updating your status and uploading photos are prime ways to get your content into the system.
For this reason the top left area is your way to always get to your current status and update on it. In fact, if you are on the new stream, just start typing and the update area will pop down and capture your new status (while showing your last one below).
Also, if you click on the camera icon, you are sent into the core photo experience on the device which natively supports uploading to Facebook.
The Navigation Grid
For all other features, we wanted to give you a quick way to access them. Click on the top right grid and a pop down will immediately appear, giving you one tap access to any feature. No need to switch to a navigation screen first.
We are also playing with the ability to use that hardware keyboard by giving you quick key access to any feature (e.g. SYM + E == sends you to events). Is that a good idea?
Facebook Logo Power
The Facebook logo itself has some hidden love. In an homage to to websites, a tap on the logo takes you home…. which means back to the news stream. If you are on the news stream already, and have flicked down…. that same logo will bring you to the top.
Where to go next?
We are excited to offer access to data that Facebook users haven’t been able to get in an app before, but where do we go from here?
We definitely want to do a lot of polish on various sections that we have out there. One idea that I have been playing with from the get go is doing something immersive when you rotate the screen when in a news feed. Instead of just having the news feed work in that format, what if the content took over. I mentioned this in my last post about touch UI. I flick through the stream and if on photos, the album takes on the entire screen for example.
There are some other really fun features that revolve around webOS notifications and giving you a great way to “never miss a thing” (life moves fast you know ;) and choosing what content matters to you.
And, finally, we have to work out what makes sense in an app, and what could be baked into the platform. Giving access to birthdays is great, but would you like to have them as a calendar on the device? Maybe, but you would definitely want to be able to turn that view off…. and in fact you may already have birthday info in your profiles, so we should have one unified birthday view. Life gets more complicated when you go to the generic doesn’t it.
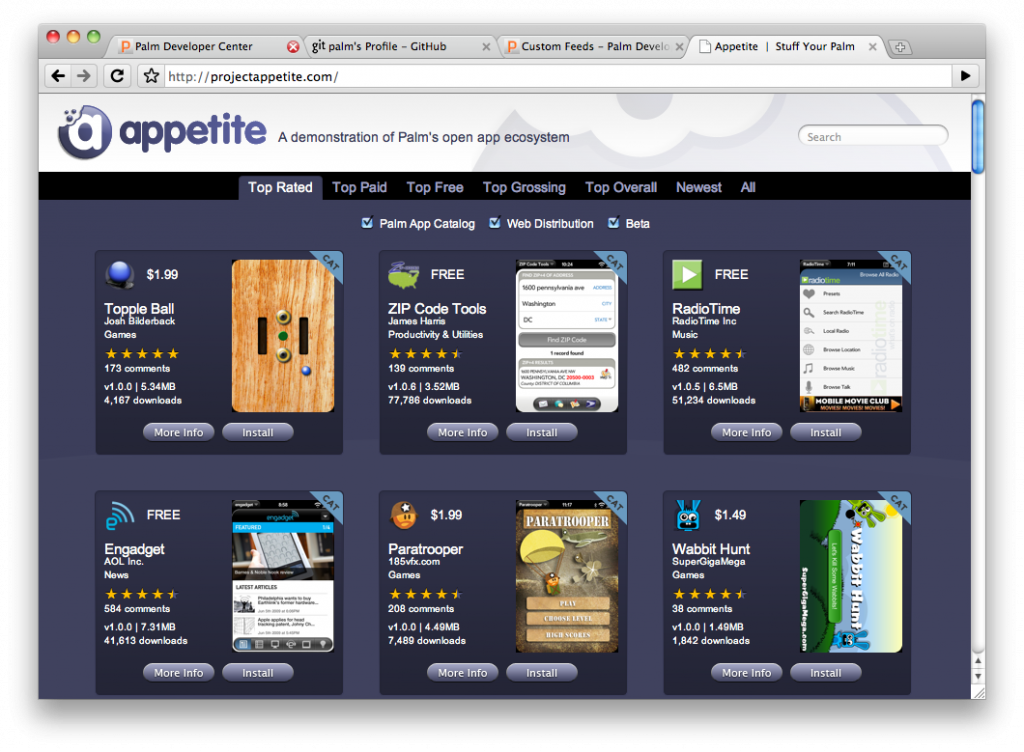
Over the winter holiday, Ben and I whipped together Project Appetite, an open source example that consumes the feeds from the Palm application ecosystem (both Palm Catalog and Web distribution). We didn’t have long to come up with something, and one of the interesting stories was how we took an API and mocked up the middle, allowing server and client to get going quickly.
The feeds that the Palm ecosystem puts out are RSS 2.0 XML feeds, with extra catalog-y info in an “ac” namespace. We converted the format to JSON to make life easier for the JavaScript client consumer. Although you can DOMParser() away (and use the Microsoft component) JSON is just so much easier. What lives at api.projectappetite.com is the result of the munging, so others could consume JSON directly if they so wish.
The Data
We quickly put together some dummy data, and for ease, put it in a file app.js that the client could consume. Once we iterated on the format, one of us could go off and write the XML to JSON code. We actually implemented this in a variety of ways as we experimented. Ben created a simple JDOM translation, and I fought with databinding, which still seems to be a royal pain with Java. The reason I checked that out was to create an open backend on app engine, and I wanted to go from XML to JSON to Java for persistence via JDO. From one set of Java objects I could @PersistenceCapable and @XStreamAlias("asset_url"). It wasn’t worth the effort.
The Client
We created an Appetite object that would be able to query the model and get the data that was needed. The constructor took the apps data, and then it did its magic. In this case is created some caches to make querying fast.
The public API contained:
app(id, locale): returns a single app based on id
find(opts): the core engine for querying the app data
types: contained the logic for filtering on top rated, top paid, newest, etc
sorts: contained the sorting functions to return the data in the right order (e.g. by download count versus date)
Very quickly the client was mocked up and the frontend was build out using this API. Again, at this point the entire front end could be built without waiting for server infrastructure.
The Server
Since the client API mocked out the functionality needed for the frontend, the server could actually reuse this logic. This is when the node.js server was born.
To play nice with node, we went back to the other files and added logic to export the data. E.g. in the client.js:
// check to see if you are running inside of node.js and export if you areif(typeof GLOBAL =="object"&&typeof GLOBAL['node']=="object"){
exports.Appetite= Appetite;}
Once that was in place, we could load up all of the information that we need:
We created a simple mapping that enabled a URL such as /app?id=[id]&locale=* to be converted to a method call of app({id:id, locale:locale}). We did this in a generic way that enabled us to add URL endpoints by simply added to the responder hash. The functions would return an object that could contain error codes and the like.
For example, the app end point:
// /app?id=[id]&locale=*
app:function(params){if(!params.id){return{
error:501,
body:'I need an id!'};}return{
body: a.app(params.id)}},
We also added a magical DEFAULT handler to take care of bad URLs.
Finally, we would boot up the listening server and handle responses:
// -- Create the HTTP server bindingvar host = process.ENV['APPETITE_HOST']||'localhost';var port = process.ENV['APPETITE_PORT']||8000;if(process.ARGV.length>3){// overwrite with command line args
port = process.ARGV[3];}if(process.ARGV.length>2){
host = process.ARGV[2];}
http.createServer(function(request, response){var path = request.uri.path.substring(1);var output;var responder =(typeof responders[path]=="function")? responders[path]: responders['DEFAULT'];
output = responder(request.uri.params);var contentType = output.contentType||"text/javascript";if(output.error){
response.sendHeader(output.error,{"Content-Type": contentType });
response.sendBody(output.body);}else{var body =(contentType =="text/javascript")? JSON.stringify(output.body): output.body;
response.sendHeader(200,{"Content-Type": contentType });
response.sendBody(body);}
response.finish();}).listen(port, host);
After 86 verbose, commented code, we had a server that would respond to URLs and return data. And in this time the frontend continued to be built out.
Being able to reuse the client JS and wrap it to become a server was a lot of fun. I am definitely a big node.js fan! Now, I am looking forward to doing a lot more with Project Appetite…. but for now we are working on a pretty cool webOS application, and getting the developer platform better and better.
It has been a very different holiday season as everyone got ready for CES this year. This is my second time at the show (first time was having the honor to pick up an award for the Gears team) and was a very different experience.
It was great to come out with some good news today: from Verizon, to video recording, to Flash, to 3D games. From a consumer point of view the Palm Mobile Hotspot is pretty sexy. Tethering has been a pain, and I was eyeing up a MiFi when I got to learn that devices will be able to become MiFi hotspots. Awesome.
All good stuff, but I am obviously most excited about the developer side of things. This year it turned out that we got to turn on the full developer program today in conjunction with the other CES news. A ton of work went into this first launch of the full program and there is a lot packed in there:
New developer portal
When you work with Ben, you quickly learn that things should be as polished as possible. He really lead the charge on making a great new developer portal with a spruced up look and feel throughout, and some good new content. There is a lot more in the works and the community has been coming together nicely to provide some fantastic documentation too. We now have a good foundation to move quickly on, and to really help developers.
PDK: On-ramp for native code via Plug-in Development Kit
One of the things I love about the Web is its diversity. It isn’t just One Community. It has sub communities galore. On the server-side you have Java and PHP and Ruby and Python and [insert every other platform] camps all at home on the Web. Even on the client-side, despite the ubiquity of JavaScript, you see many different types of developers.
I am really happy that we are providing the Plug-in Development Kit (PDK) that will enable a path to native code on the platform enabling a role that we have seen on the Web via Flash, Gears, QuickTime, RealPlayer, and on and on.
The goals of the PDK are:
Easy porting of C/C++ applications to webOS, including those that use OpenGL ES 1.1 or 2.0
Easy integration of C/C++ components to enhance the capabilities of webOS applications
Flash 10.1 fits into this picture too. I am glad that we have a path for Flash developers to get their content to our users. Adobe has been working very hard to make their engine work on mobile. This has got to be a tough problem given the nature of it (event loop etc) and they are doing great. Can’t wait to see the finished product.
Hot Apps
We want to put our money where our mouth is, and want to reward developers in a fair way, so we decided to offer $1 million dollars in cash bonuses to webOS developers through our Hot Apps Program.
Contests are interesting, but having been involved in a few myself, they get very subjective and judging can be difficult. This is why this time around we wanted to try to let the market do its thing and reward developers based on downloads and how many devices have installed their application.
Some high level info:
The Palm Hot Apps Program will reward developers of the hottest webOS applications with a total of $1 million. The top rewards of $100,000 will go to developers as follows:
The developer of the free webOS application that’s downloaded the most between February 1, 2010, and May 31, 2010 will receive a $100,000.
The developer of the paid-for webOS app that generates the most revenue during the same period will also receive $100,000.
Developers of other top free and paid apps will also receive cash awards, as follows:
The next 20 apps in each category: $10,000 each
The next 200 apps in each category: $1,000 each
To qualify for an award, your app – either free or paid – must be available to webOS users via Palm distribution programs between February 1, 2010, and May 31, 2010. In addition, the following criteria apply:
The app must have been developed using the Palm webOS Software Development Kit or the Ares Integrated Development Environment. Since the Palm webOS Plug-in Development Kit is not widely available, applications utilizing this development kit or any APIs not in the Palm webOS SDK are ineligible.
Apps must be available for download through an official Palm webOS distribution program (App Catalog Distribution, Web Distribution, or Beta Distribution). Apps distributed through non-Palm methods do not qualify.
Apps developed by Palm employees or their direct relations are ineligible for awards.
What do you think of this approach?
GitHub Palm Repository
I am a huge GitHub fan and I am really glad that we have opened up our Palm GitHub account with some goodies. We have various projects that contain sample code that go from ye olde hello world app, to Mitch Allen’s great news app from his book to the indispensable stylematters app that our great HI put out to show you how to make beautiful, usable applications.
I hope that this is just the beginning and that you will see more and more projects on GitHub to fork! Speaking of projects to fork….
Project Appetite
One of the new projects is Project Appetite which is an open source project showing how you can interface with the Palm application feeds that come out of our full catalog.
Now you can integrate the feeds yourself. There are a lot of different pieces in that one project, and I need some other posts to go into details on the front end code (some fun CSS transforms if you are in Safari on Mac and hit Ctrl-F!) as well as the backend (using Java, node.js and lots of good stuff). There is still a lot that we want to do to help people and this is just the beginning of that project.
Phew. What a way to start the new year. Thanks for joining me on this journey and I can’t wait to see what folks come up with (including us!)
I have been having a great time hacking on code that let’s me do interesting things on my device. With webOS you get to use your old favorites (HTML/JS/CSS and Web APIs that you know) and now you are ready to take Web applications that you may have even already written, and make them work for the mobile form factor.
The two biggest challenges I have found so far on the design side have been dealing with the real estate available (screen size) and the touchy feely-ness of the device.
We have been trained on the desktop, thanks to the mouse as our pointer interface, to click lots of buttons. The tactile feedback that we get is the button looking depressed, but that is about it. The mouse has a lot going for it. The fact that I have a set of states due to the fact that there is a difference between having the cursor located somewhere, and having a click on that location is useful. It can be especially useful for discoverability. As a user mouses around you can unveil information “hey, if you click this button X will happen mate!” It also has the nice side effect that your hand can rest on it.
The infamous Minority Report interface looked great, and spawned many “look how we can do this now” prototypes, but try holding your hands in front of you for 10 minutes, let alone 8 hours :)
The mouse has a lot of drawbacks though. It is a level of abstraction. You aren’t touching the objects, you are touching a device that takes your input and does the real touching. This of course leads to touch screens and bypassing that abstraction. Watching my son tap and drag and manipulate a touch screen has been great to see. It matches the physical world a lot more. He tried to touch my laptop screen at first too.
Since you are mimicking the real world more though, you get into the uncanny valley problem. If you drag something…. it SHOULD drag! One of the interesting design choices that iPhone made was to allow you to drag things even though some folks would say “don’t let them do that, there is nothing back there”. You then saw studies where people were taking their browser screens and dragging them around just for fun. Crazy :)
Applications started to take advantage of this. iPhone started with many buttons. The back button is the classic one that is all over the shop. On webOS there is a gesture area that trains you quickly to swipe back whenever you want, like going back a page. It is fun to watch a webOS user try to swipe when using an iPhone. You get used to it, you like it, it feels more natural.
Applications like Tweetie 2 groked this too. They took away the refresh button and added a draggable notion. You drag the list down and let go to spin it into action. In many ways this is more work than a simple tap and is a touch less discoverable, but it has the benefit of “feeling nice” and once you know about it, there isn’t a darn button in front of you all the time. The UI can get out of the way.
The Newsroom feedreader app on webOS does a really nice job here too. You flip and drag and move throughout most of the interface. After awhile it feels like you have a large virtual space and you are just moving the view port around to see what you want to see. It feels nice. I strangely find that it makes me want to use the application much more than an app with buttons and simple taps. Maybe I am just strange.
I find that I really enjoy the horizontal scroll. I wanted to build a simple HorizontalScroller component for webOS, but first I will detail the low level side of using a Scroller webOS component to get this effect.
A simple way to build a horizontal scroller is to have a div that contains all of the pieces of content (pre-loaded, or you can lazily load by adding nodes to this div). It extends wider than the 320px viewport size of the Pre/Pixi and contains other elements that are each 320px. We have a view that contains this, and a controller that sets it all up:
/* A scroller needs a container element */.scrollerContainer{width:960px;height:400px;border:yellowsolid1px;}/* An item that is viewable in the scroll pane window */.scrollerItem{float:left;width:320px;min-width:320px;}
The key is the “horizontal-snap” mode that make the drag physics feel right and ties to the snapElements which are the DOM elements for the inner divs. The widget takes care of snapping to those elements for you!
Of course, you can use this base to do a lot. The afore mentioned Newsroom styles the divs so it looks like switching cards.
Next up: I will get the HorizontalScroller component done and dusted to make life even easier.
Conclusion
It is enjoyable to use the constraints of screen size and the natural feeling of touch and put them together to make great apps that live with you in your pocket. I thought screen size would be a huge issue, but in some ways it has been nice to have that constraint. It means you focus on the core functionality. Dealing with the touch vs. mouse issue is an interesting one too and will have you ending up with a very different interface if you embrace the feel.
What have you found enjoyable about using mobile apps vs. desktop ones?
I am having fun taking my Web skillz and applying them to mobile with webOS. It is obviously important that I learn about the platform. I want to understand the limitations, and get a feel for the SDK so I have opinions on where to take it (Fortunately, the community gives us great feedback, keep it coming!).
As I develop applications I quickly see repetitive tasks that fit into my workflow. You can quickly iterate when you are developing your application and when I am testing in either the device or the emulator I find myself repeating the following cycle:
The application packager palm-package prepares an application for installation by converting the files in the application directory to an .ipkg file that can be consumed by the emulator or device.
palm-run takes the given directory to package up, or “.”.
palm-install
The palm-install tool installs a packaged application on the device or emulator.
palm-run uses the -d option to specific device or emulator. The default is “tcp” which means emulator. Use -d usb to send to the device.
palm-launch
The palm-launch tool launches (or closes) an application on the emulator or device.
palm-log
palm-log displays log messages from an application on the emulator or USB-connected webOS device. The log output is simpler and easier to read than the output in /var/log/messages, and the timestamp is the local time instead of GMT. You can also use palm-log to display the installed applications, which is useful for getting the ID of the application to log.
palm-run [-d DEVICE] [-L] [-o DIRECTORY] [directory]

-d DEVICE: Defaults to installing to the emulator. Use 'usb' for device
-L : By default the palm-log command is run. This suppresses that
-o OUTPUT: By default the ipk is generated to /tmp

Examples

palm-run ~/myproject # deploy from /tmp to emulator
palm-run -d usb -L -o /packages ~/myproject
palm-run # use the current directory and all the defaults
I am so excited for the Ares team at Palm today as we launch Project Ares a web based IDE for the mobile web.
The full experience packs a lot into the browser: visual designer, code editor, visual debugger, log viewer, source code integration, drag and drop file upload, built-in app preview, and the ability to run your app directly in the emulator or even the device!
I am so jazzed to see this out there. At Mozilla we saw the Ares team building this great product that uses Bespin right now for the code editor, some of the server side, source control and debugger (the first sighting of Bespin debugger!)
The team has worked incredibly hard since then to build what you see now in public beta form.
This also shows how awesome the web platform it is. Because webOS builds on the web we are able to have features like the “preview” feature that shows you how your app will look without even having to go to the emulator or device.
The performance of the app says a lot too. It is incredibly responsive for me, especially since there are a lot of features packed in there. The layout system is really well thought out too and is a dream when you compare to CSS fun. I can’t wait to see what the community has to say about Ares, and I want to hear features that they would like. After using this, I want to be able to build all kinds of web apps from it ;)
I also want to say thanks to my Bespin team mates and community as well as the new friends I have made at Palm. Matt, Scott, Steve, Frankie…. you guys are awesome and it is amazing to see what you have done in short order!
“If you squint, Chrome Extensions and webOS applications look similar” — a wise friend
Having now written webOS applications and Chrome Extensions I have been struck by how similar they are, and could be.
It may seem weird to see similarity in a browser extension mechanism and a mobile application runtime, but when you look at it, there is plenty to share at a high level:
Breaking out of the sandbox
Both worlds need to break out of the web browser sandbox. Extensions can’t be restricted to the same limitations and Chrome Extensions have various API that relate to UI elements in the browser, as well as getting access to more.
On webOS we have exactly the same issue. When building native applications on webOS you can’t have the same restrictions and thus new APIs, UI widgets, and services.
This issue goes beyond even these too worlds, and is one of the big challenges for Web runtimes in the near future. I expect my runtime to be able to do a lot more and to get access to my data not just through third party server side services, but locally too. This all brings us to…
Permissions
The Web needs a permissioning model. The sandbox doesn’t give us enough, and although people quickly talk about security (which is critical) we forget what happens if the user can’t do something through the Web. They often will download an .exe to their local computer and will just run it, not knowing anything about what it does.
A big challenge for us is to come up with a model that doesn’t Do A Vista and drive our users nuts. We have to balance the desire to not ask the user for something all the time, while making sure the user knows what is happening. For power users at least, I favour the idea of showing me what is going on. Even if I grant an application a lot of power, if I could see when and what it was doing it would help. Of course, being able to restrict access to APIs is fantastic, especially when you get to layer social trust on top of the technical security. The Mozilla team talked a lot about just this and I look forward to more of their ideas and implementation.
The permissions and other metadata need to live somewhere. We have a appinfo.json file that has you declare info on your app. Chrome has a manifest.json.
On the Web we don’t really have this. You hit a URL and you bootstrap from there. The HTML5 manifest does tell the browser which files are in scope for caching and the like, but that is about it. Applications and extensions can tell the system much more. You have ids, versions, pointers to update, icons, main launching points or not…
Headless Chickens
You don’t often think of a headless web app. You can think of headless applications and extensions though. How many services are running on your computer now that have no UI? On webOS you can noWindow away and still provide value through the various services that we offer, the obvious being the rich and varied notification styles. Background apps are nicely supported.
Chrome Extensions have the notion of a background page as a way to manage a long lived lifecycle. Your background page is a singleton:
In a typical extension with a background page, the UI — for example, the browser action or page action and any options page — is implemented by dumb views. When the view needs some state, it requests the state from the background page. When the background page notices a state change, the background page tells the views to update.
In webOS and the Mojo framework we have a rich MVC system with a detailed lifecycle as well as the simple ability to define models, views and controllers.
And on
The more I look at these worlds, and others like them (e.g. Jetpack) the more I hope we come together. There are similar needs, and when you look from Chrome Extensions to Chrome OS, you can see a potential progression if done right.
I love PPK and he is doing great work, but I have to respectfully point out a few things here, especially as some folks thought I put him up to it. For those who are jumping on him in entirety, here does have some things right too! Don’t just get mad at the fact that he called developers arrogant and stupid ;)
There are fantastic web applications on the iPhone. I use Gmail and Google Reader as a Web app, for example. The browser is good, but I have written many times (before being a Palm employee! These are my thoughts… blah blah) about how I wished that Apple let me go the extra mile and access more from the Web side of things.
Although you can do great apps like Gmail, the user experience available to Web developers isn’t anywhere as close to that of the iPhone SDK.
APIs: You are unable to access the rich APIs on the device. Sure you can get local storage and appcache, but you can’t get to the compass and the [insert tons of APIs here]. Your app may not need it, but they may be able to greatly benefit from them… let alone the enhanced graphics and performance.
Discoverability: There are two worlds. The Web and the App Store. How does a user find out about your Web app? Sure they could use the power of Google etc…. but if they are trained not to do that anymore? Fortunately we have PhoneGap and Titanium and … stepping up here
So, the feeling of “come on iPhone devs, don’t be stupid and just develop a web app!” is going a tad too far. There are very valid reasons to use native. With PhoneGap et al, there are growing reasons to cover various bases.
At Palm I am excited to push the Web stack further by having it as the SDK, not as an option in the browser. I believe that the Web can be the unifying platform across the multitudes of devices that users will have in the future. This world is going to cause a large number of changes to how we develop experiences, and I am excited by the challenge and working with the Web community (companies and individuals) to meet the challenge.
There is so much to be done on both the technology side (html5 on devices, apis, services, gpu, etc) and on the delivery side (future of app stores, richer discoverability, etc). You can also create fantastic applications for many platforms using Web technology TODAY!
Update
Faruk Ateş has written a detailed post on this topic too that discusses similar issues to my post above, but also goes beyond with more details on $, and the SDK experience.
When you think of a Web application, you think of going to an HTML page that then loads scripts and resources to display functionality. Applications in general do not always fit that model. If you launch an “application” like Growl on the Mac, a window doesn’t launch. It merrily kicks off a service in the background.
The same is possible in the world of webOS and browser extension systems. One of the user experiences that I enjoy on webOS is the notification system. Non-modal, and any application can tie into it. There are various levels of notifications:
Banners: Thin bottom line one liner that appears quickly
Icons: Notifications are grouped together in time
Dashboards: Larger areas. A DOM window so you can put controls in there. For example, the media dashboard lets you play, pause, etc.
Popups: Even richer larger actionable areas
More on these notifications in another post. If you have an application that wants to tie into the notification system you can do so even if a window isn’t open.
I wanted to find out how to do this, and luckily Mitch Allen has a simple example of this in his RSS News application that he builds in his book on Palm webOS.
I hope to offer a simpler API specialized for this, but it is quite trivial to do thanks to the Power service. The timeout service is located via palm://com.palm.power/timeout and there are various properties that you can pass in to do the real work when you are woken up. What application should be opened? What task should be run when opened? That is all tied in via the application manager service (e.g. see the palm://com.palm.applicationManager/open service below).
The wakeup code in the news application is defined in the setWakeup method in the main application assistant (NOTE: assistants help with the controller part of MVC in Mojo):
// setWakeup - called to setup the wakeup alarm for background feed updates// if preferences are not set for a manual update (value of "00:00:00")
AppAssistant.prototype.setWakeup=function(){if(News.feedUpdateInterval!=="00:00:00"){this.wakeupRequest=new Mojo.Service.Request("palm://com.palm.power/timeout",{
method:"set",
parameters:{"key":"com.palm.app.news.update","in": News.feedUpdateInterval,"wakeup": News.feedUpdateBackgroundEnable,"uri":"palm://com.palm.applicationManager/open","params":{"id":"com.palm.app.news","params":{"action":"feedUpdate"}}},
onSuccess:function(response){
Mojo.Log.info("Alarm Set Success", response.returnValue);
News.wakeupTaskId= Object.toJSON(response.taskId);},
onFailure:function(response){
Mojo.Log.info("Alarm Set Failure",
response.returnValue, response.errorText);}});
Mojo.Log.info("Set Update Timeout");}};
Mojo applications have a certain lifecycle and your application will get callbacks for setting up, shutting down, activation (when you come back to a scene), deactivation, etc.
Thus, you will see that setWakeup is called in the main AppAssistant.prototype.setup and when the application is launched AppAssistant.prototype.handleLaunch.
Anyway, suffice to say, having a lot of fun digging into webOS.